When you startup Outlook for the first time the first thing you should see is a dialog box expressing you are staring the Outlook 2003 startp. Just press next on this window.
The next dialog box you will see is a question if you you like to configure Outlook to connect to an Email server of some kind. Select Yes. Also if you have already used Outlook before you can just slect the menu of TOOLS and select Email Accounts to start to display a list of options and select Add an email account.
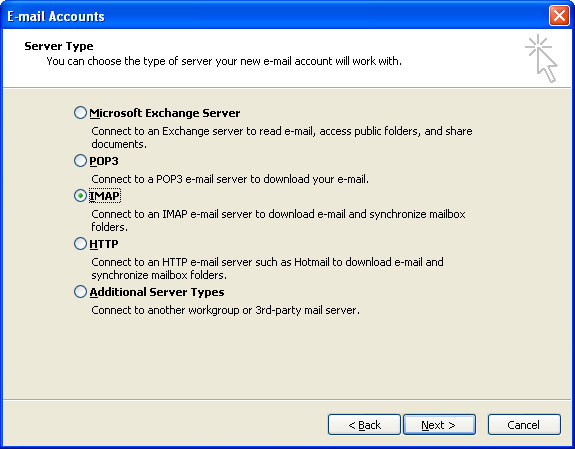
Then press the Next button. You should then see a dialog box aking for the type of mail server. . If you are using our service for email you should select IMAP.
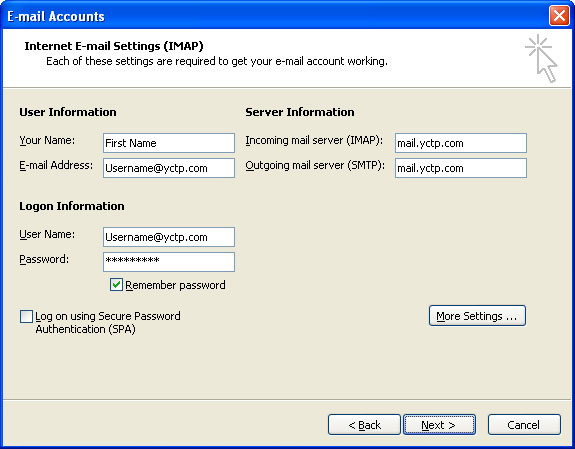
Then press the Next button. You should then see a dialog box requesting alot of information. First start on the left side and Enter your full name the way you would like it to be displayed to others. Now enter your email address. Be sure to have the correct spelling. Most YCS clients have their own domain name. If you have your own website or domain name just use your username @ and your domain name. (Username@domain.com) If you do not have your own domain or website then you are using the YCS mail domain which is YCTP.com.(Username@yctp.com) Again be sure you have the correct spelling. Now move to the right and enter the incoming and outgoing mail servers. Again be sure you have the correct spelling for your username and domain. Now move to the bottom left and enter your user name. Be sure to enter your entire email address and on the second line enter your password. It will not display on the screen but instead with display stars.
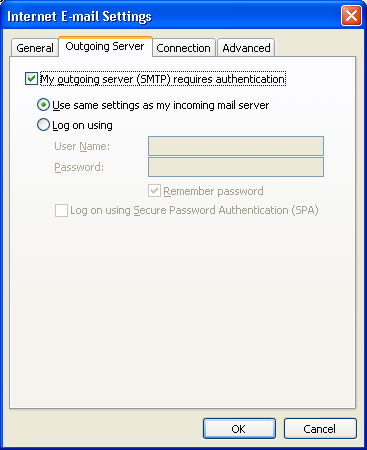
Now click on the More Setting... Button. You will see a dialog box with tabs at the top. Select the Outgoing Server tab. Click the checkbox that is labeled My outgoing server (SMTP) requires authentication. Now press ok and you will be back at the previous dialog box.
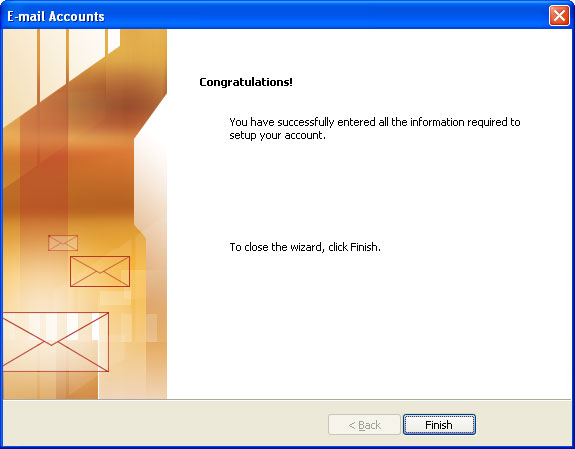
Now go ahead and press the Next button. You will see a dialog box congratuating you on completing the email setup. You can now press Finish. You will then see your new email account on the left side bar. Select the inbox under the email server name and you will be able to send and recieve email.
Now you are DONE!! You are ok to go ahead and use your email. If you have more accounts to setup just go to TOOLS and EMAIL ACCOUNTS to add more. The above information is provided as a courtesy to our clients and are only to be used by clients that are comfortable with your computer. We will not be responsible for any lost emails or accounts. If your email is not working be sure to contact your YCS technician to assist you.